In this tutorial we are going to look at how to create a semicircle in Lightburn.
The first thing I’m going to do is select the Ellipse tool.
Now I want a perfect circle so I press the shift key on my keyboard and drag out the circle while holding the shift key down. This will ensure that we get a perfect Circle.

Right click on the shape and select the Convert to Path option. When you click that option nothing appears to happen, however, it has converted the shape to a path and now we can edit the shape.

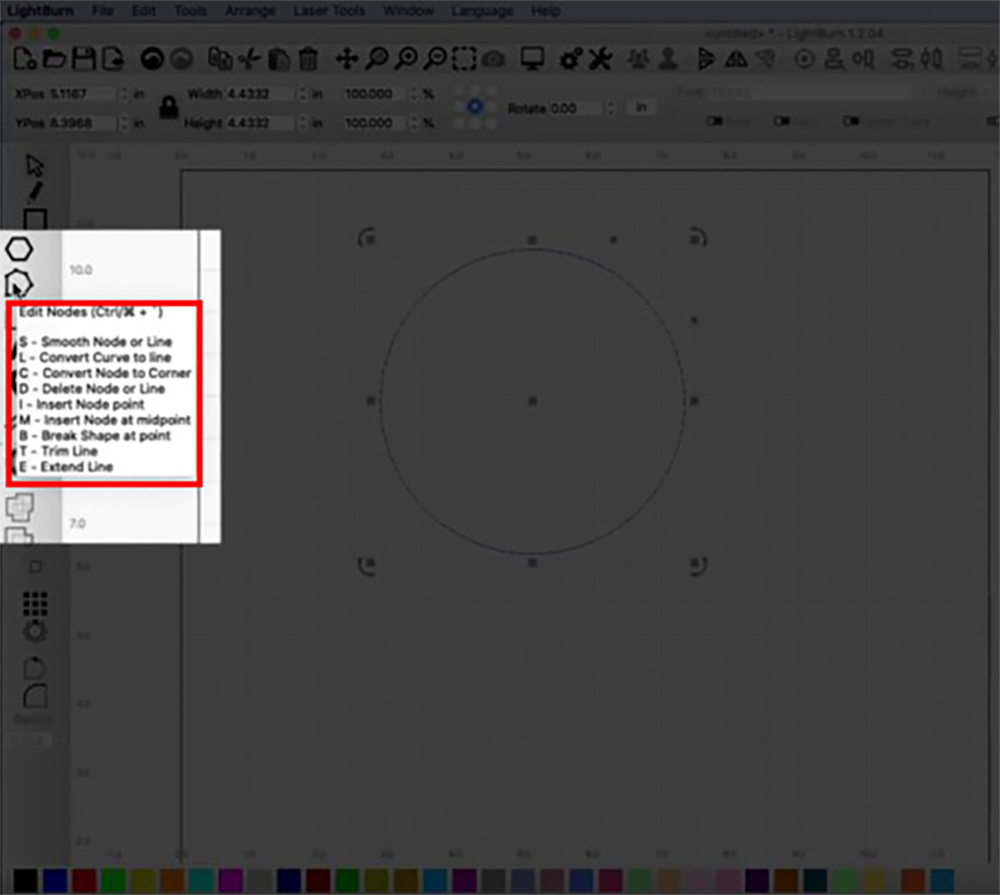
Click the “Edit Nodes” icon in the left menu. As you hover your mouse over it, you’ll notice some options appear underneath. These options are represented by letters, indicating the corresponding keyboard shortcuts.
We want to delete some nodes so the option we want is the ‘Delete Node or Line’ option which is the letter ‘D’.
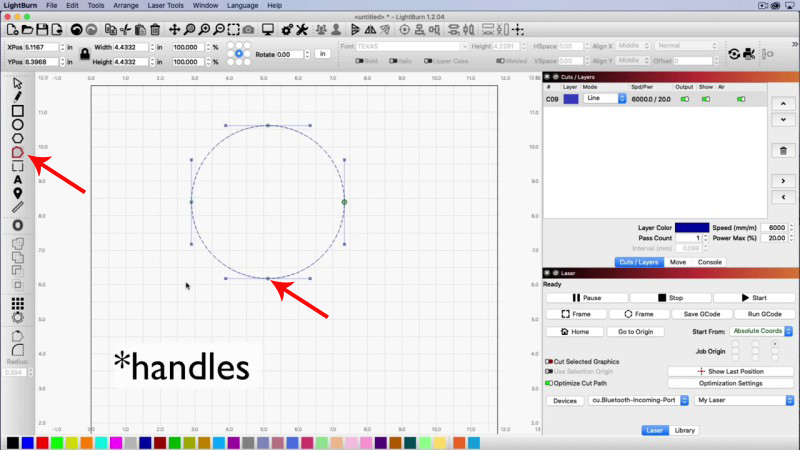
We need to click on our shape first and you will notice that handles appear around the shape.
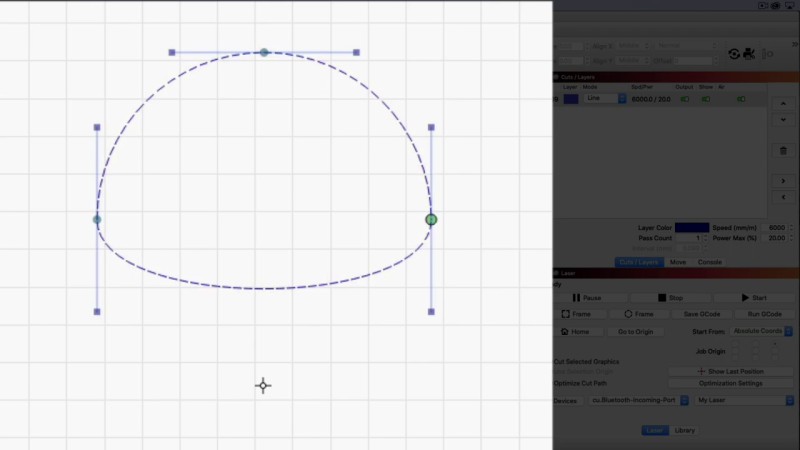
Now the first node I want to delete is the lower one. Hold the mouse over it until you see the crosshair appear and then press the letter ‘D’ on the keyboard.
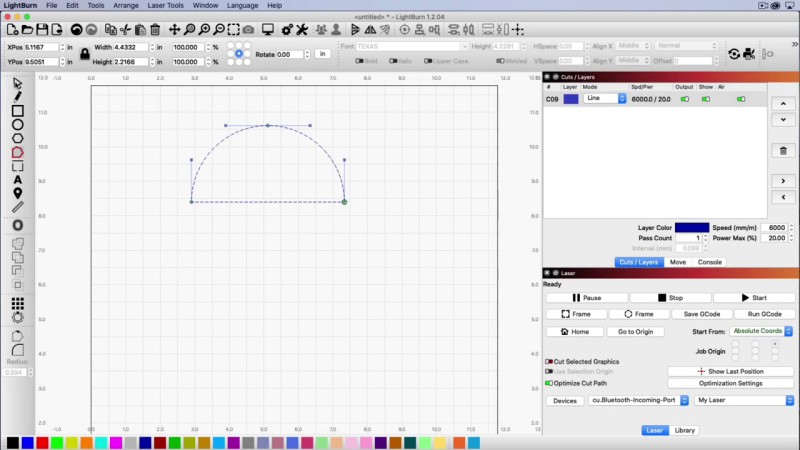
Once I have clicked on the D key you can see that the lower node is removed. However, we don’t want this sort of rounded line. I want this to run straight across like a proper semi circle.
So let’s fix this.
Come back to the Edit Nodes option. It will still be selected but now we need to check which letter we need to convert this rounded shape to a line. This is the letter L.
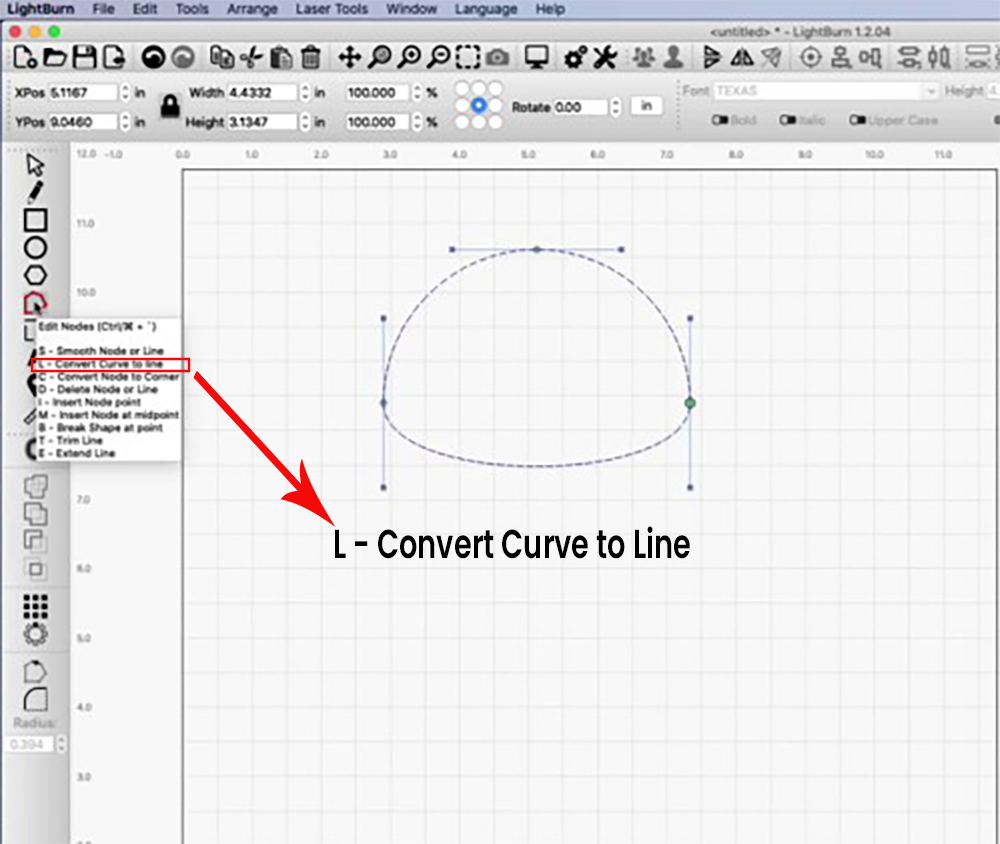
Now we come back to the shape and hold the mouse over the node to highlight it so that the cross appears, and then press the L key on the computer.
That straightens the line and now we have a semicircle and we can just click on the select key.
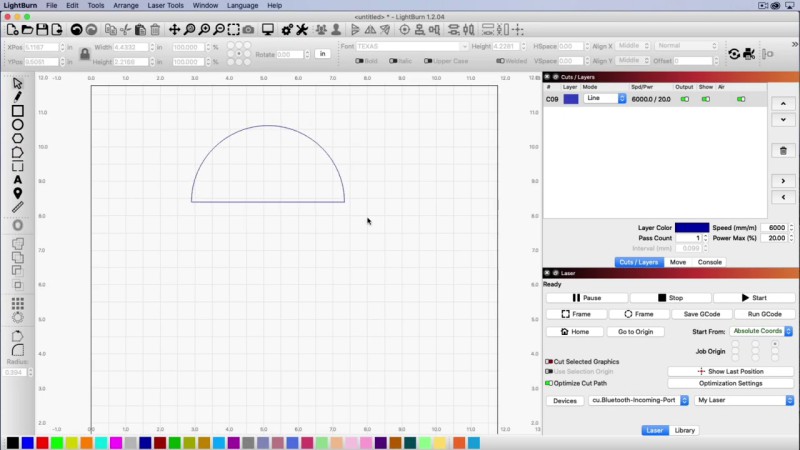
And there we have it a perfect semi circle.
Leave a Reply