We have a new laser. It’s the Wainlux K8 Laser Engraving and Cutting Machine. This laser was kindly sent to us by Wainlux for review and we are extremely happy they did. I love the cube style and the classy black exterior. This is the cutest little machine, but it’s powerful and way cheaper than you might think.

Links
The WAINLUX K8 Mini Laser Engraving Machine is available from:-
Wainlux Website
Aliexpress
US Amazon
WAINLUX MD22-Mini Purifier For K8 Laser Engraver
Wainlux Website
US Amazon
We have a $30 discount code for the machine
Discount code – GOLASERGO – ( May not work if there is a sale on in the store)
Links to Cutting Files
Creative Fabrica Files
- Coaster – Dinner is Poured – https://bit.ly/3R2hCvX
- Vintage Truck Christmas Card – https://bit.ly/3G4gzFy
- Round Coaster Bundle – https://bit.ly/3R3UltF
- Tiger’s Head – https://bit.ly/47iDskD
Watch the Video Review
WHATS IN THE BOX?
The Manual
First of all, we have the USER MANUAL and as user manuals go, this one is a pretty decent. It’s well illustrated throughout which makes a world of difference when you are trying to set up something like this, and we found the instructions easy to read and follow.

The manual also has a nice table of FAQs at the end and these are very handy for any troubleshooting questions you may have. So many manuals don’t add FAQ’s so you are often left scratching your head to work something out, or you head of to YouTube to see if others have had the same problem.

So this is a nice feature that Wainlux have added to the manual.
MATERIALS
Next in the box is a MATERIALS PACK. It’s always nice to get a few goodies when you buy a new laser and this one includes a few things to get you started.

We received the following:
- Adhesive vinyl
- Leather – although I’m pretty sure this is faux leather
- Kraft paper – which is more like a heavy card stock
- Some wood and they don’t specify what it is but it looks like plywood
- What looks like Black Scratch Paper
- And some Metal Business Cards.
THE LASER
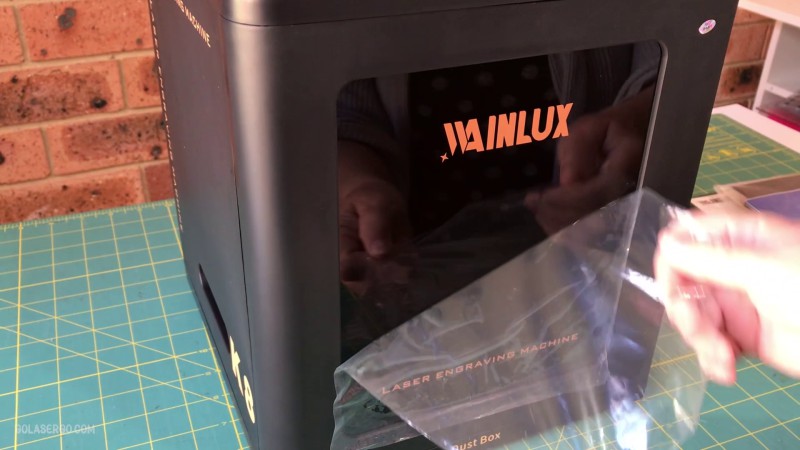
Now we come to the machine itself and as we were unpacking it, we almost jumped with joy as we realised that we wouldn’t have to assemble it – it’s all fully self contained and ready to go right from he box – well almost ready to go – we do have to connect a few things, but there are no screws or bolts, Allen keys or anything else that indicated we would have to build our own machine.

We started by peeling off some of the protective plastic on the front and back of the machine and then opened up the front door and lo and behold we found some more goodies.
So we took them out and in the first box we found:
- A couple of dog tags
- A marker pen
- A window mirror
- An L-Shaped locator
- A brush
- And a Type C USB Cable

- And in the other box was a power supply cable.

After putting the goodies aside we peeled off the protective covering inside door the front door and there was also a protective covering on the back door of the laser.

Then all we had to do was plug the power cord into the machine and into the power source.

AIR PURIFIER
Wainlux also included an air purifier for us – this is an optional accessory. An air purifier is pretty much essential if you are working inside or in a small enclosed area. We filmed inside and it was a godsend. The Air Purifier definitely reduces the amount of fumes but you can still smell the burning wood as the machine engraves.
To connect it we just had to attach one end of the duct pipe to the side of the laser engraver and another to the top of the air purifier.

Okay, so with the addition of the air purifier, our setup is complete and now we are ready for the software.
THE SOFTWARE – CUTLABX
The first thing we needed to do was download the drivers which are available for both PC and MAC. (You can download the drivers here. Just select the TF card option for your laser and download either the [K8_02_MAC] or [K8_01_Windows] zip file depending on which operating system you use. You will find a DRIVER folder there. Just load that onto the TF card and then follow the instructions in the manual to install it.)

You essentially have to load the drivers onto an SD card, which is included, and you will find it on the inside of the back of the machine. Once you have copied the drivers onto the card, you can load the drivers onto your computer.

It’s a micro SD so keep that in mind as you may need an adapter on some computers.

And now for the software itself. This machine uses CutLabX software and it was easy to install and it looks nice but I have to admit that after using it for a time, neither of us were particularly enamoured with it. It has a number of issues that need sorting out particularly for the Desktop version – I mean simple things like an UNDO button – is there one there that I am missing?? Apparently yes it’s missing.

When we got around to using the IOS version on my iPad we had a little more success but it could still do with some work.
I feel that we will end up using Lightburn in future, but for this video we continued with the CutLabX software as we had dragged out a PC we had in storage to download the drivers onto as we couldn’t seem to get the MAC drivers to work. Wainlux did end up sending us the updated Mac drivers but by then we were committed to using the PC.
CONNECTIVITY
This machine uses both USB and WiFi, however if you want to make use of the camera functionality you do have to have it connected to WiFi.

CAMERA
The camera is a great feature and it’s really a must in my opinion. Without it, I’m not sure how you would be able to position things accurately. It made a big difference when trying to line up text on a coaster for example.
Perhaps if your focus is mostly on wood model kits or similar then the camera may not be as critical but for things like coasters, metal business cards and tags for example, then it is a must.
There is a a preview button that frames the object to be engraved or cut, but sometimes it can be a bit difficult to see through the protective screen, and this is why the camera is perfect for aligning everything nicely.
I did notice that on some occasions I had to press the Camera option twice. The first press would reveal a washed out image and the second press would make it clearer.


FEATURES OF THE WAINLUX K8
Now let’s take a look at some of the features of this machine.
The Wainlux K8 we have here is a 10w machine but you can also purchase a 2.5w or a 5w.

You can see the cutting capacity of each of the machines in this table so obviously the 10watt is going to cut to greater depths so keep that in mind when deciding on which one to purchase.

Now this machine has two doors so you can access it from either the front or the back. This makes it really easy to get in and give it a good clean and we found wet wipes do the best job here.
Even so, I would really have liked the ability to remove the working plate in order to give it a really thorough clean.


Having said that, they do include a dust tray which allows you to easily remove any dust or debris that has fallen into the base of the machine.

And speaking of doors, it’s worth noting that opening the door while it is running will instantly pause the machine. And when you close it again, it will restart.
So this is a great safety feature. It makes it a perfect first laser machine for older children.
I also like the lighting on the side of the machine. When it is running, the light will be blue and when the project is completed it will turn white.
This made it easy to tell from a distance if the machine had finished the job.


AIR PURIFIER
Now you can purchase an air purifier for this machine and although its only little it actually works quite well. You are still going to get a bit of burning smell so it’s not going to keep the smell away completely but you can really tell the difference between having it on or not.

PROJECTS
So let’s take a look and see how easy it is to create a project.
First of all, the plate is where you place your material and you’re looking at a working area of 130mm x 130mm.

So you place your material on the plate, and lower the focus lever.

Use the dial on the side of the machine to raise or lower the plate.

Once the laser head is the right distance from the material, you return the focus lever to its original position.

Then over in the software you need to import your image and if you are using the camera you need to click the CAMERA icon from the top of the screen.. This will allow you to resize and position the image over your material.

Then you click on the CUT/LAYER panel and add your settings. And by the way, all of the settings we used for these projects will be on the website so check for the link in the description field below.

You can click PREVIEW and this will frame the object so you can see if it will engrave in the right spot.
Then once you are happy with everything, you can click START.

MDF Coaster
For our very first project we are engraving an MDF Coaster with the design – Dinner is Poured.

- So we have our coaster all set up and the laser head is in the correct position.
- We have our design selected in the software
- We have done the preview and everything looks good.
- So we press start in the software,
- And away it goes!
Settings Used
- Speed – 8000 mm/min
- Power – 80%
- Engraving time 1
Now for some reason we started filming from the back of the laser so everything was upside down, but we did end up filming from the front so we can better see what’s going on.
And it’s done a beautiful job. I really love engraving on MDF as it always comes out perfectly.
This was our very first attempt at engraving on the Wainlux so we were pretty happy with the result.
Settings List
When we started we didn’t have a materials or settings list so we it was a bit of trial and error to get settings that worked.
However, Wainlux provided us with a list when asked for one, and that helped a lot. We should have contacted them sooner, it would have saved us a some some time and effort.
KRAFT CARDSTOCK
For our second project we used a piece of the Kraft card stock that came in the materials kit with the machine.
We chose a Christmas theme as thought this was quite cute and would make a nice card. Again, the file for this design came from Creative Fabrica.

It came out great considering we were guessing the settings on this one.
Settings Used:
- Speed – 8000 mm/min
- Power – 50%
- Engraving Time -1
The Wainlux engraves really well on card stock and we were pretty pleased with the result. We make cards and journals so engraving on cardstock is something we will certainly make use of.
METAL DOG TAG
Next we decided to try one of the metal dog tags. This also came in the materials pack and it was so tiny so we definitely used the camera on this one.

We were able to add text in the software and resize and move it around to get it into the best position using the camera.
Settings Used:
- Speed – 600 mm/min
- Power – 100%
- The tag took approx 3 minutes to engrave.
This engraved beautifully although maybe the settings could have been a bit more intense.
ROUND COASTER
Now to see how well this machine cuts. We had some round coaster files and thought we would try one from that bundle.
The one we chose has a nice lace pattern and we used MDF for this one.

Settings Used:
- Speed – 100mm/min
- Power – 80%
- This coaster took approx. 19.57 mins to cut.
We could have gone a little higher with the power as some of the smaller pieces needed a little help to be removed.
We were pretty happy with the result though. It looks really nice.
METAL BUSINESS CARD
Next we tried a metal business card and we added our website name to it.
It came out okay but not great. It turns out that our settings were way too intense. At this point, we didn’t have any recommended settings to go with so we were just testing things out as we went. We should have contacted Wainlux sooner as they sent us a list of settings when we finally asked for them.
So we did another run using the settings Wainlux provided and it worked out so much better.

Settings we should have used
- Speed – 3000mm/min
- Power – 25%
SCRATCH PAPER
In the materials pack were a couple of pieces of scratch paper. We’ve never worked with this so we had no idea what settings to use. Again, we hadn’t contacted Wainlux for a settings list so we just took a guess.

Settings Used on first run
- Speed – 8000 mm/min
- Power – 40%
It came out okay but once we had the correct settings from Wainlux it came out come out a lot nicer.
Settings we should have used
- Speed – 10000 mm/min
- Power – 15%

DRAGONFLY MODEL KIT

There are a number of awesome files in the software. We did cut out a dragonfly but forgot to change to page 2 so ended up with only one set of pieces. So we couldn’t put it together for you as we only had 2 pieces of the wood provided.
So we cut it out with balsa wood but it was too thin and the pieces wobbled around instead of fitting nice and tight. We also cut out the design with some other wood we had on hand but that was a little bit thicker and the pieces wouldn’t slide into each other.
In the end we went to our local Bunnings Hardware store and purchased a sheet of 3mm plywood. Of course these sheets are really large but thanks to Paula’s skill with a saw we soon had a couple of pieces that we could cut out with the laser..
We chose the dragonfly that was available from Cutlabx and it cut out beautifully.
So do try out their lovely designs but take care about the thickness of your board.
DIE CUT CARD
One hobby of mine is making greeting cards so I wanted to test the machine out on cardstock. I chose a file from Creative Fabrica and thought this came out great.
It took a little bit of time to get all the pieces out but I loved the result. So two thumbs up for this one.

FINAL THOUGHTS
I can sum it up in one sentence – “Love the machine, the software not so much.”
A very useful review. How did you get hold of the settings list? Wainlox do not seem an easy company to contact.
Here’s the link to the settings Keith: https://docs.google.com/spreadsheets/d/11MlAkrxlHDvvHmHkd1_rUDgnP6v0HgTV80ZwqpeSiV8/edit#gid=0
Brillinat! Thanks
Thanks for you comment Keith. It’s a great little machine which doesn’t take up too much room in the craft room. We really like it.
Awesome review.. Which settings did you use for the die cut card??
Thanks
Guido from Italy..
I am really sorry Guido, for some reason we haven’t made a note of the cutting requirements for the card.