So what is Lightburn OFFSET FILL?
In Lightburn, Offset Fill is a way of speeding up your engraving time by filling a shape with lines that follow the contour of that object.
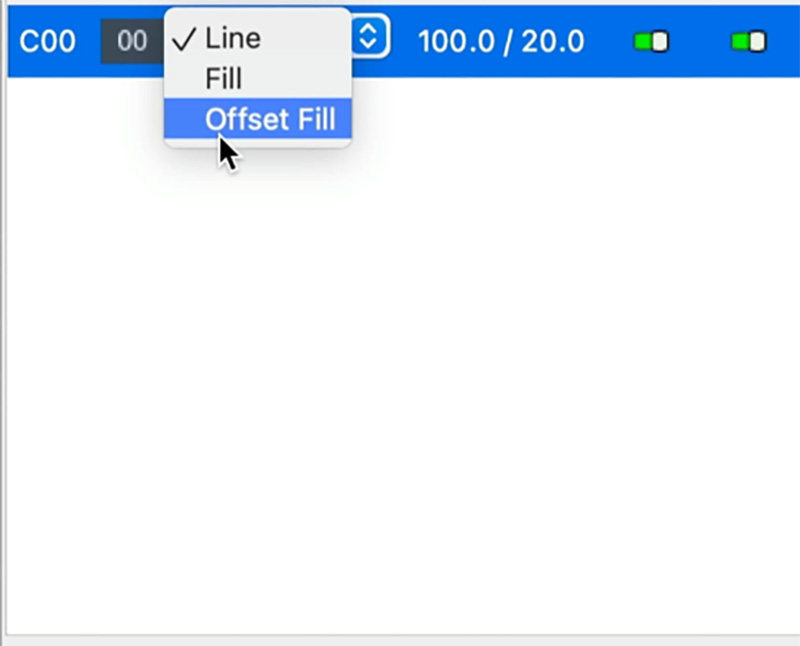
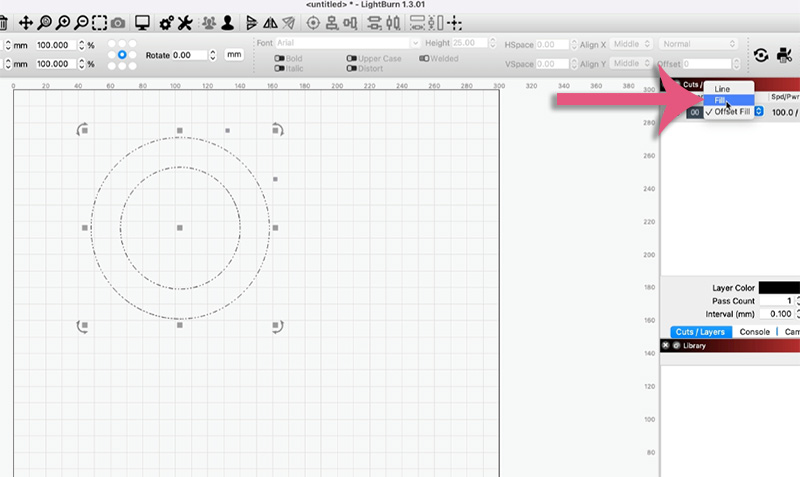
If you’ve been using Lightburn software for your laser projects then you’ve already noticed that there is a drop down in the Cuts/Layers panel.

When you click on it, there are three options that are available to you.
These are:
- Line
- Fill
- Offset Fill
The one I’m going to focus on in this tutorial is Offset Fill.
The best way to illustrate what the Offset fill is, is to show you a comparison between Fill and Offset Fill.
I have a circle on the screen that I want to engrave. So I select the Fill option.
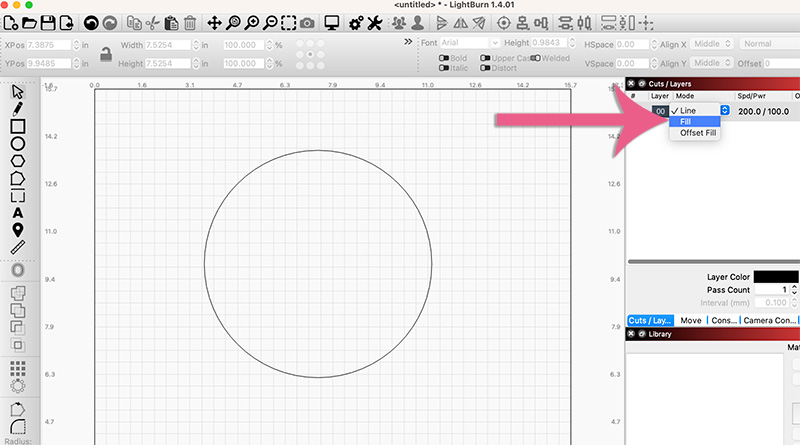
Then I come up to the top menu and click Preview. Selecting the Preview option is simply to show you how the laser is going to engrave the design.

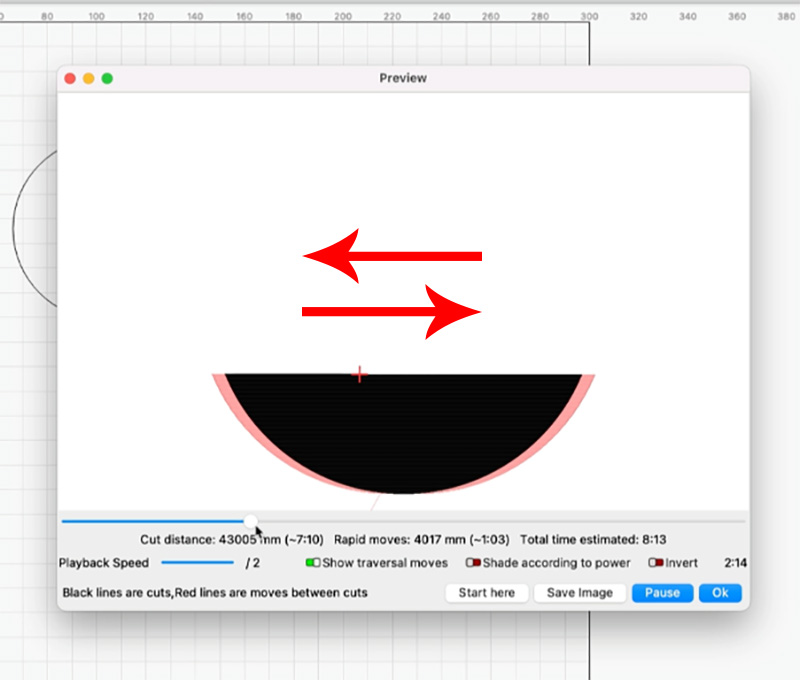
By pressing Play, you can see how your laser machine will move from left to right and right to left in order to engrave this and it’s just going to keep moving from side to side until it completes the circle.
***Honestly, at this point you should really watch the video above to better see this in action.***
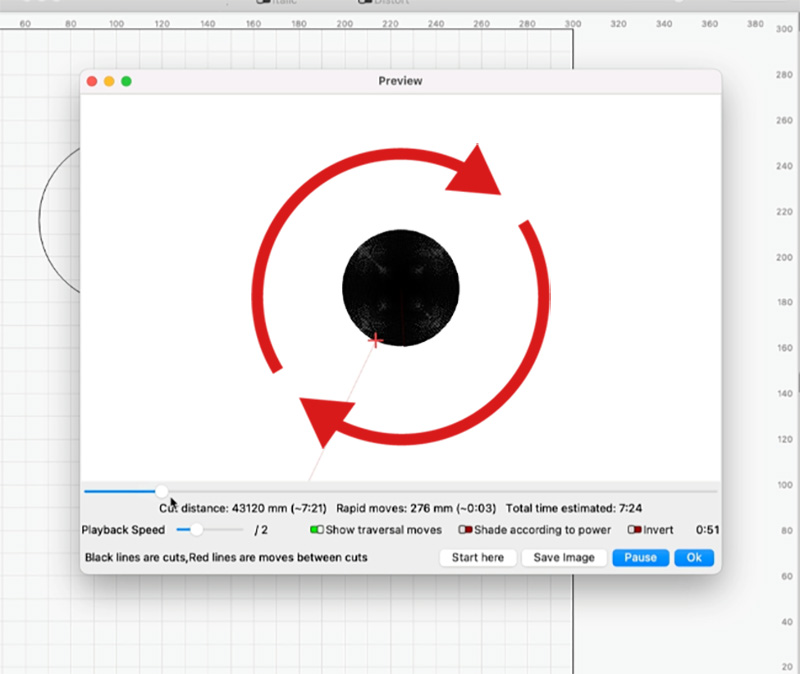
Now, I’m going to try Offset Fill.
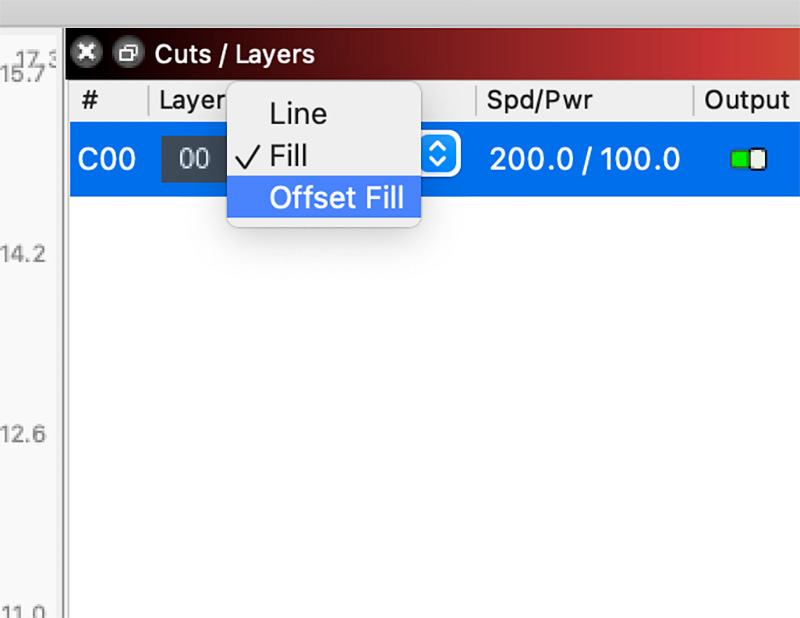
And I will select Preview again from the top menu.
When you play this one, you will see that instead of running from side to side, instead it’s going around in a circle. That’s how your engraver is going to work. It’s going to keep going until it creates completes the whole circle.
Again, you really should watch the video above as this will make a whole lot more sense than these images will.
So what is the benefit of offset fill?
Well, basically, it’s going to speed up the engraving process and ultimately your laser engraving time.
You can see this more clearly if I turn the circle into a donut shape – (watch the video above to see how I do this). And then I am going to select the FILL option.
Now when I select fill and click on Preview, you’ll notice that there’s a lot of red space, and there’s also a black area.
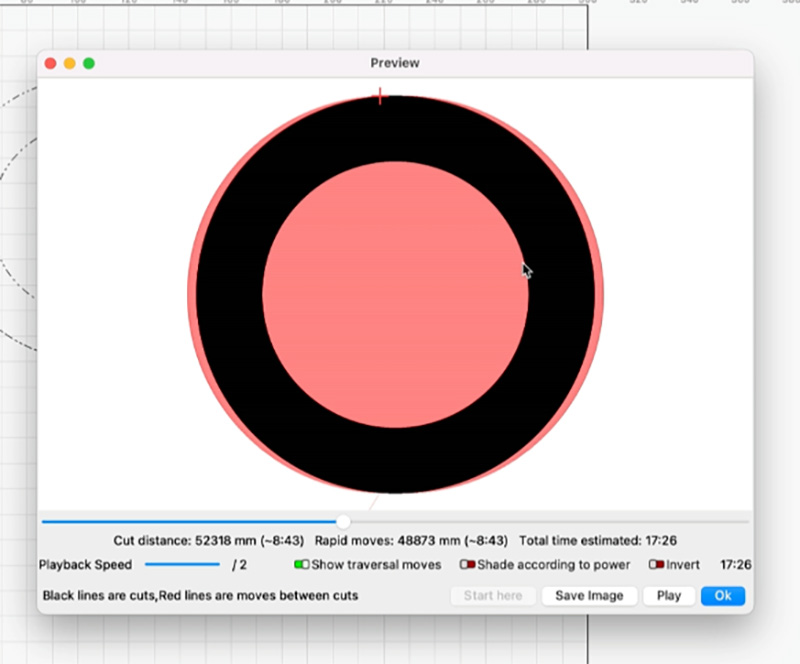
The black part is the actual engraving part, that’s what’s going to be engraved.
Anything in red is really just the laser passing over that area.
So if we play this (and watch the video to see this in action), you can see again your laser’s moving, going left to right but it’s wasting time moving over the red bits to get back to the other side.
And if you look at the image above you can also see the total time for this is going to be 17 minutes or so.
Let’s Speed This Up!
If we change this now to Offset Fill and we Preview it, you can see the total time is almost halved.

It’s only going to take about nine minutes.
You may also noticed that there is no red area showing in the Preview.
This is because it is going to only follow the shape of the donut and go around and around in a circle. This means it’s only going to be concentrating on doing the laser part (the black part). The laser head won’t be moving from left to right to get to the other side because it’s just going to go around in a circle.
As you can see, this can really speed up the amount of time it takes to engrave your design. It went from 17 minutes using FILL to only 9 minutes using OFFSET FILL.
What to Look Out For
There is one negative with doing this, that may occur with more complex shapes. Your machine is used to going from left to right and right to left, and when it’s doing something more complex it may not be able to handle it as well. So just keep that in mind.
But otherwise, this is a great little option to use.
Leave a Reply